
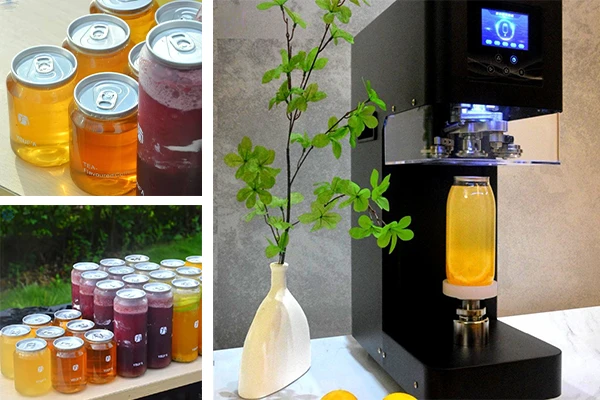
Bottle & Can Your Own Beer, Soda Like a Pro
Ever dreamed of capturing that perfect homebrewed beer or fizzy homemade soda in sleek, professional-looking cans or bottles? A home canning machine makes this achievable, turning your kitchen or garage into a mini-packaging hub. Forget bulky industrial setups.
Today’s compact canning machine for home use empowers craft enthusiasts to preserve and share their creations with impressive quality. This A-Z guide unlocks the process of using a soda canning machine or canner machine for your beverages.
Why Choose a Home Canning Machine?
-
Preserve Peak Freshness: Seal in carbonation and flavor immediately after brewing or mixing, far better than bottling alone.
-
Professional Presentation: Cans and bottles look great, travel well, and make fantastic gifts.
-
Convenience & Control: Package small batches on your schedule. Perfect for experimenting with recipes.
-
Reduced Oxidation: Proper canning significantly lowers oxygen exposure compared to some bottling methods, extending shelf life.
Your Essential Home Canning Toolkit
-
The Star: Your Canner Machine: This is your core canning machine forhome use. Options range from:
-
Manual Tabletop Fillers/Seamers: Affordable entry-point, great for very small batches (e.g., 5-15 cans/hour). Requires separate CO2 purge often.
-
Semi-Automatic Machines: Offer features like automated filling, CO2/N2 purging, and seaming with foot pedal control (e.g., 15-30 cans/hour).
-
-
CO2 or Nitrogen (N2) Tank: Essential for purging oxygen from cans before filling (counterpressure) and sometimes for lid gassing. A standard 5lb tank is common for home use.
-
Cans or Bottles & Lids: Source food-grade, sanitized empty cans (slim or standard) with matching ends, or suitable bottles (glass/PET) and caps.
-
Sanitizer: Non-rinse, food-grade sanitizer (e.g., Star San, Iodophor) is MANDATORY. Everything touching the beverage post-boil must be sanitized.
-
Cleaning Supplies: Dedicated brushes, hoses.
-
Beverage: Your perfectly carbonated, chilled homebrew beer, soda, kombucha, seltzer, or cold brew coffee!
The Home Canning Process: Step-by-Step
-
Beverage Readiness:
-
Ensure your beer or soda is fully carbonated and crystal clear (cold crash if needed).
-
Chill the beverage to near freezing (33-40°F / 1-4°C). Cold liquid holds CO2 better.
-
Chill your cans/bottles too.
-
-
Rigorous Sanitation (The MOST Crucial Step!):
-
Disassemble your home canning machine components per the manual.
-
Thoroughly clean then sanitize EVERY part: filler head, seamer chucks, wand, hoses, can/bottle holders, counterpressure probes. Soak, spray, or circulate sanitizer.
-
Sanitize the outside of your CO2/N2 regulator and gas lines.
-
Sanitize your cans/bottles and lids/ends immediately before filling.
-
-
Setup Your Canner Machine:
-
Assemble the sanitized canner machine on a stable surface.
-
Connect your chilled, sanitized beverage source (keg is easiest).
-
Connect the CO2/N2 tank and regulator. Set pressure according to your machine/beverage (often 8-12 PSI).
-
Perform a test run with water or sanitizer to check for leaks and ensure smooth operation.
-
-
Filling & Sealing – Capturing the Fizz:
-
Purging: Place a sanitized can/bottle under the filler head. Activate the purge cycle (usually via foot pedal or lever) to flood the container with CO2/N2, displacing oxygen.
-
Filling: Slowly open the beverage valve. Fill to the appropriate level (leaving headspace – crucial!). Modern soda canning machine or beer fillers often use a counterpressure fill tube that retracts as the liquid rises.
-
Lid Placement & Gassing (Cans): Gently place a sanitized lid on the filled can. Many machines offer an “under-lid gassing” puff to blast out residual O2 just before seaming.
-
Seaming/Sealing: Immediately transfer the filled can to the seamer head or place the cap on the bottle in the capper. Activate the seamer/capper. For cans, this rolls the can end and lid flange together creating an airtight double seam. For bottles, it crimps the cap.
-
Repeat: Move quickly but carefully to the next container.
-
-
Post-Canning & Quality Check:
-
Inspect Seams/Seals: Visually check every can seam for defects or check bottle cap tightness. Feel for sharp edges on cans.
-
Rinse: Gently rinse the outside of cans/bottles with clean water to remove any sticky residue. Dry thoroughly.
-
Label (Optional): Add your custom labels.
-
Incubate & Test: Store cans/bottles at room temp for 24-48 hours. Check a few for carbonation level and signs of leaks. Discard any that seem under-carbonated or leaky.
-
Storage & Enjoyment
Store your professionally packaged home beverages in a cool, dark place. Properly canned beer can stay fresh for 3-6 months (or longer!), while sodas are best enjoyed within a few months. Chill thoroughly before opening. Crack open that can or pop that bottle cap and savor the fruits (or hops!) of your labor!
Embrace the Craft!
Investing in a home canning machine elevates your home beverage craft from hobbyist to artisan. Whether you’re preserving a prized IPA, bottling vibrant homemade ginger ale, or canning refreshing seltzer, the right canner machine puts professional-quality packaging within reach. Follow the steps, prioritize sanitation, and you’ll be sharing your delicious, shelf-stable creations in no time. Cheers to capturing that freshness!
